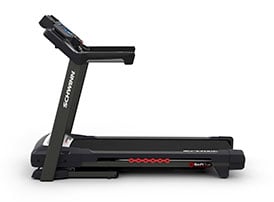
Treadmill 25 / Treadmill 10 Assembly Video
Below assembly video applies to both the Treadmill 25 and the Treadmill 10 machines.
BowFlex Treadmill 25 & 10 Assembly Video.
Introducing the new Treadmill 10!
Begin by selecting an area where you are going to set up and operate your Treadmill.
For safe operation, the machine must be located on a hard, level surface.
Please allow a minimum work area of 24 inches around the perimeter of the treadmill. The back of the treadmill will require a minimum 79 inch clearance.
Be sure that the workout space you chose has adequate height clearance, taking into consideration the height of the user and maximum incline of the machine.
Do not cut the shipping strap on the base assembly until it has been placed face up in the appropriate work space.
Before you begin the assembly, please make sure you read the Assembly Manual thoroughly, as it contains important safety warnings and assembly tips.
Please note that there are some steps in the assembly process that might require two people to help with the assembly.
Some components of the machine can be heavy or unwieldy. Please use a second person when doing assembly involving these parts.
For assembly assistance, please visit us online or give us a call.
Check the assembly for a complete parts list.
Please note that a right ("R") and left ("L") decal has been applied to some parts to assist with assembly.
The following wrench is included with your assembly: a 6mm Allen Key, as well as a Number Two Phillips Screwdriver.
Step One, Attaching the Uprights.
Begin Step 1 by locating the base assembly, part 16, and setting it flat on the floor.
Next, locate the right upright, part 12, and place it on the front right side of the base assembly.
Slide the upright into place and match the holes located on the base upright.
Attach the upright using three part A screws, three part B lock washers, and three part C flat washers. Two in the front and one on the back.
Hold the upright in place and hand tighten the hardware at this time, as you will need to fully tighten the hardware at a later step.
The back, or interior hardware, will be hand tighten onto the hole located on top of the upright.
Do not use the bottom hole and do not crimp the cables.
Repeat these steps for the opposite side and attach the left upright, part 20.
Once both uprights are in place connect the console cables from the base assembly to the right upright cables.
Be sure to fully connect the cable connectors. The connectors should easily connect when inserted correctly.
Step One is now complete.
Step 2, Attaching the Crossbar, and Pivot Covers.
Begin Step 2 by locating the crossbar, part 6, and placing it in between both uprights.
A right "R" decal has been applied to the right side of the crossbar to assist with assembly.
Matching the inner holes of the uprights, slowly slide the crossbar into place.
Next, attach the crossbar using two part A screws, two part B lock washers, and two part C flat washers.
Hand tighten the hardware at this time as you will need to fully tighten the hardware at a later step.
Repeat these steps for the opposite side.
Next, locate the left pivot cover, part 18, and place it on the bottom left side of the base assembly.
Slowly push the cover into place and match the end indentation side of the treadmill.
Snap the pivot cover into place and attach the cover using two part D screws.
Insert the screws into place and fully tighten the screws using the provided number two Philips screwdriver.
Repeat these steps for the opposite side, and fully attach the right pivot cover.
Step Two is now complete.
Step Three, Attaching the Console Base Assembly.
It is recommended that someone assists you with this step.
Begin Step 3 by locating the console base assembly, part 4, and placing it on top of each upright rail.
The cables from the right upright, will be attached to the cables located on the right side of the console base assembly.
With some assistance, hold the assembly while you route the upright cables into the right rail, and slowly slide the console base assembly into place.
Do not crimp the cables.
Next, connect the upright cables to the console base cables.
Be sure to fully connect the cable connectors. The connectors should easily connect when inserted correctly.
Once the cables are attached, proceed to securing the assembly to the uprights using three part A screws, three part B lock washers, and three part C flat washers per upright.
Insert the screws into both allocated holes located on the right side of the upright, and one hole located on the back side.
Hand tighten the hardware at this time, as you will need to fully tighten the hardware at a later step.
Repeat these steps for the opposite side.
Step Three is now complete.
Step Four, Attaching the Upright Supports.
Begin Step Four by placing the left upright support, part 19, and placing it on the left side of the base assembly.
The upright support attaches to both the upright rail and to the bottom base rail.
Attach the upright support using three part A screws, three part B lock washers, and three part C flat washers per upright support.
Starting with the center top hole, loosely install the hardware at this time.
Hand tighten the hardware for now.
Once the first screw is in place, proceed to loosely installing the top hardware.
Once the top hardware is in place, proceed by loosely installing the bottom screw.
Next, repeat these steps for the opposite side and attach the right upright support, part 14.
Loosely attach the hardware at this time, and follow the same sequence as the left upright support.
Start with the center hardware, followed by the top screw, and then the bottom screw.
Once both upright supports are attached, go back and fully tighten all hardware using the provided 6mm Allen Key.
Repeat this step for the opposite side and fully tighten all hardware using the provided 6mm Allen Key.
Next, go back and fully tighten all hardware from the previous steps.
Starting with the top console base assembly hardware, use the provided 6mm Allen Key and fully tighten the hardware on both uprights.
Next, proceed to fully tightening the crossbar hardware.
Finally, fully tighten the hardware located on the bottom of each upright.
Make sure to fully tighten the hardware on the back inner side of the uprights.
Once all hardware has been tightly secured, Step Four is now complete.
Step Five, Attaching the Side Handlebars.
Begin Step 5 by locating the right handle assembly, part 11, and attaching it to the right upright.
The right handlebar controls the speed while the left handlebar controls the incline of the machine.
A right ("R") and left ("L") decal has been applied to these parts to assist with assembly.
Slowly slide the handlebar into place. Insert the cables through the upright tubing and take care not to crimp the cables.
Next, connect the handlebar cables to the console cables located on the back.
Be sure to fully connect the cable connectors. The connectors should easily connect when inserted correctly.
Once the cables are connected, proceed to securing the handlebar using three part A screws, three part B lock washers, and three part C flat washers.
Insert two screws through the right side and one screw through the bottom of the handlebar.
Fully tighten the screws using the provided 6mm Allen Key.
Next, repeat these steps for the opposite side and attach the left handlebar assembly, part 21.
Connect the handlebar cables to the console cables located on the back.
Be sure to fully connect the cable connectors. The connectors should easily connect when inserted correctly.
Once both handlebars have been tightly secured, Step Five is now complete.
Step Six, Attaching the Upper Handlebars.
Begin Step 6 by placing the left upper handlebar assembly, part 25, on top of the left handlebar assembly.
The right handlebar controls the speed while the left handlebar controls the incline of the machine.
A right ("R") and left ("L") decal has been applied to these parts to assist with assembly. Connect the cables before attaching the handlebar.
Do not crimp the cables.
After connecting the cables, be sure to push the connectors up into the upper handlebars, and then slowly slide the upper handlebar into place.
Be sure the upper handlebar is fully inserted.
Secure the handlebar using two part A screws, two part B lock washers, and two part C flat washers.
One set of hardware gets attached on top while the other set gets attached through the bottom.
Insert the hardware into place and fully tighten the screw using the provided 6mm Allen Key.
Once the top screw is in place, proceed to attaching the bottom hardware.
Fully tighten the screw using the provided 6mm Allen Key.
Next, repeat these steps for the opposite side and attach the right upper handlebar assembly, part 10.
Once both upper handlebars have been tightly secured, Step Six is now complete.
Step Seven, Attaching the Base Shrouds and Outer Junction Covers.
Begin Step 7 by placing the bottom right base shroud, part 7, on the bottom right inner part of the treadmill.
Be sure that the right base shroud hides the cable connectors. If necessary, push the cables further into the right upright.
Slowly slide and push the base shroud into place.
Repeat this step for the opposite side and attach the left base shroud.
Next, locate the right outer junction cover, part 9, and place it on the right side, covering the right handlebar assembly.
Matching the holes on the rail, push the cover into place.
Secure the cover using one, part E screw.
Insert the screw into the hole located on the top exterior of the shroud.
Fully tighten the screw using the provided number two Philips screwdriver.
Repeat these steps for the opposite side and attach the left outer junction cover, part 24.
Step Seven is now complete.
Step Eight, Attaching the Inner Junction Covers.
Begin Step 8 by locating the right inner junction cover, part 8, and placing it on the inner bottom section of the frame assembly as shown.
Be sure that the right cover hides the cable connectors. If necessary, push the cables further into the right upright.
Secure the right inner junction cover using three part E screws.
Insert the screws into the allocated holes and fully tighten the screws using the provided number two Phillips screwdriver.
Repeat these steps for the opposite side and attach the left inner junction cover, part 23.
Once both inner junction covers have been tightly secured, Step 8 is now complete.
Step Nine, Attaching the Crossbar Tray.
Begin Step 9 by locating the crossbar tray, part 5, and placing it in front of the crossbar in between both uprights.
Slowly lower the tray into place and fully cover the crossbar.
Step 9 is now complete.
Step 10, Attaching the Console Mast.
Begin Step 10 by locating the console mast, part 3, and placing it on top of the frame assembly, as shown.
Route the cables through the console mast and then attach the console mast to the frame assembly.
Pull the cables all the way through with enough slack and take care not to crimp the cables.
Secure the console mast to the frame assembly using two part F screws, two part B lock washers, and two part C flat washers.
Fully tighten the screws using the provided 6 mm Allen Key.
Step 10 is now complete.
Step 11, Attaching the Console Assembly.
Begin Step 11 by locating the console assembly, part 2, and placing it in front of the console mast.
The cables from the console assembly must be routed through the console mast before hooking the console assembly into place.
Next, place the console onto the console mast, and route the cables through and out of the console mast.
Fully pivot the console assembly downward, and secure it to the console mast.
Connect the cables and take care not to crimp the cables.
Each cable connector has a corresponding end connector. Be sure to fully connect the cable connectors.
Next, secure the console assembly using four screws and four flat washers.
Insert the screws through the console mast and into the console assembly.
Fully tighten the screws using the provided number two Philips screwdriver.
Finally, gently slide each of the connectors and their cables down into the console mast.
Step 11 is now complete.
Step 12, Attaching the Console Rear Cover.
Begin Step 12 by locating the console rear cover, part 1, and placing it on the top front side of the frame assembly.
Push the cover into place. Do not crimp the cables, and make sure the console cables are pushed down.
Slowly push the cover until it snaps into place.
Step 12 is now complete.
Step 13, Connecting the Power Cord and Safety Key.
Begin Step 13 by placing the power cord, part 17, in front of the treadmill near the bottom of the base assembly.
Next, slowly plug in the power cord into location.
Connect this machine to a properly grounded outlet only, please see the grounding instructions in this machine. When ready to operate the machine, be sure to turn on the power with the power switch.
Make sure that the power adapter wire stays clear of all moving parts.
Finally, locate the safety key, part 15, and insert it into place.
The safety key gets inserted to the center of the frame assembly, as shown.
Slowly push it into place.
Congratulations! You have now completed the assembly of the BowFlex Treadmill 10 fitness machine!
Before using the machine, please make a final inspection.
You may now remove any protective covers from the face of the console. Please inspect the machine to ensure that all fasteners are tight and components are properly assembled.
Do not use until the machine has been fully assembled and inspected for correct performance in accordance with the Assembly Manual.
Please reference the Assembly Manual for workouts, troubleshooting, and other program features.
Enjoy your new Treadmill 10 fitness machine!
Brought to you by BowFlex!


